2011 New Years Resolution is to play with a new ingredient every week in my cooking. Criteria is as follows - I must not have used the ingredient before, no recipe is to be used more than once, the recipe can reflect inspiration from another but must be my own work, and the end product must be edible!

Tuesday, December 27, 2011

Ingredient 40 - Cherries

Cherries are truly seasonal fruits, featuring on kitchen tables mostly from November to January.

The cherry tree will produce its first crop after 6-8 years and will continue to produce edible fruits for up to 100 years. Cherries are picked with care, as they will not ripen post-picking. The stem is also keep intact to the fruit until eating time to prolong its life.

Cherries are a great source of Vitamin C as well as containing many valuable antioxidants to help keep the body healthy. They are also a great nutritional snack with 100g providing only 210kJ.

A simple yet scrumptious Christmas salad!

Roasted Cherry and Goats Cheese Salad

700g cherries
70g pine nuts
1 packet baby spinach leaves
100g goats cheese
3 tbsp red wine vinegar
2 tbsp light olive oil
1 tsp sugar

  • Preheat oven to 140°.
  • Gently remove seeds from cherries by firstly slicing into hemispheres and then popping out seed with a knife.
  • Lay on a baking tray, drizzle with 1 tbsp red wine vinegar and roast in slow oven for 15min.
  • Remove the cherries and allow to cool slightly.
  • Toast pine nuts in oven for approx. 7min or until golden.
  • To make dressing whisk vinegar, oil and sugar together.
  • Place the spinach leaves in large shallow bowl, top with cherries, scatter the pine nuts and crumble the goats cheese on top. Drizzle over dressing and toss well to combine.


Monday, December 26, 2011

Ingredient 39 - Mascarpone

Mascarpone is a indulgent triple-creme Italian cheese originating from Lombardy in southern Italy.

It is a very soft and spreadable cheese, extremely rich in taste, reflecting its 75% fat content. Some say that the cows are fed flowers and herbs to produce this distinguishable flavour.

Mascarpone can be used in savoury dishes, accompanying smoked salmon and chives or mixed with anchovies and spices as a spread, but can simply accompany fruit or mixed in with coffee. However it is mostly renowned for its inclusion in the traditional Tiramisu.

The festive season always provides a great excuse to indulge!


Grilled Peaches with Prosciutto and Mascarpone Macadamia topping
Serves 16 as entree

8 yellow peaches
¾ cup whole macadamias
¼ cup honey
8 thin slices prosciutto – roughly 100g
200g Mascarpone
  • Half the yellow peaches by slicing and twisting to separate into hemispheres, then remove seed by scooping it out from the flesh gently.
  • Preheat fan baked grill to medium-high.
  • Place the peaches flat side up on a baking tray. Grill in oven for 10min or until just starting to brown and bubble on top.
  • Roughly chop the macadamias. Place in a bowl with the honey and heat in microwave for 30seconds.
  • Mix half the honey mixture in with the Mascarpone.
  • Divide the slices of prosciutto into half by gently ripping the meat lengthways.
  • To assemble wrap a piece of prosciutto around each peach half, spoon some mascarpone mixture on top in the little indents where seed used to live, and dollop remaining honey and macadamia on top.
  • Immediately prior to serving place under grill for a couple of minutes to slightly crisp the prosciutto and warm Mascarpone.

Tuesday, December 13, 2011

Ingredient 38 - Fennel

Fennel is a perennial herb often described as either one’s ‘friend or foe’ depending on your tastebuds!

The herb dates back to ancient Greek time, given the name ‘marathron’ after it was grown on the field of one of the greatest ancient battles fought.

Fennel is quite a versatile ingredient. Its leafy foliage is often used as a base in Italian salads, as well as bulbs baked or eaten raw. Fennel fruits or ‘seeds’ in comparison are quite a unique and strong flavour, resembling that of aniseed, and are mostly used to spice Kashmiri and Guharati cooking.

Shop for bulbs with a clean, firm and solid appearance with no signs of bruising or splitting. The bulbs should be whitish or pale green in colour and leafs bright green.

Enjoy this summer salad!


Shredded Chicken, Fennel and Grape Salad
Serves 4

3 chicken breasts
1 tsp minced garlic
1 chicken stock cube
juice of 1 lemon
1 tsp lemon rind
3 baby fennel
½ white onion
½ bunch flat leaf parsley
1 ½ cups seedless green grapes

Dressing:
2 tbsp capers – drained
2 tsp Dijon mustard
½ tsp minced garlic
4 tsp light olive oil
salt + pepper
  • Bring to boil a large saucepan of water. Add chicken stock cube and minced garlic and stir to dissolve. Place chicken breasts in saucepan and poach for 15-20min or until cooked through. Remove and cool slightly
  • Thinly slice the baby fennel. Heat a good dollop of olive oil, lemon rind and 1tbsp lemon juice in small saucepan and sauté fennel for 5min or until just wiltered but still firm with crunch.
  • Thinly slice the white onion, halve the grapes and roughly chop the flat leaf parsley.
  • Once the chicken is cool gently shred the breast with your fingers, pulling small pieces of breast in the direction of the cut to form long thin strands.
  • To arrange the salad place the salad ingredients in a large bowl, top with chicken and toss well to combine. Drizzle with dressing and serve immediately.
  • To make the dressing roughly chop the capers and place in a bottle with the mustard, olive oil, remaining lemon juice and garlic. Shake well to combine and season with salt and pepper

Wednesday, November 30, 2011

Ingredient 37 - Beer

Beer is one of the most widely consumed beverages across the world with the average human being drinking 13,248 beers in their lifetime.

Beer in culinary dishes dates back centuries to mid-1500s to Europe, in particular Germany and England. Today it is most famously recognized for beer battered fish and chips, or even the odd creation the Beer-can Chicken.

Beer has been described as adding a whole new dimension of flavor to a recipe, with it flavoring food by either the bitterness from the hops, sweetness from the malt and yeasty bite from its creation via fermentation process.

Here it adds a lovely twist to a prawn pizza. Any male should be salivating right now!

Beer marinated Prawn Pizza

Pizza base
Makes 1 thick base or 2 thin
1 satchet dried yeast
1 tsp caster sugar
¾ cup lukewarm water
1 ½ cup plain white flour
pinch salt
  • Place the lukewarm water in a small bowl and sprinkle the yeast and sugar on top. Let it stand for 20 minutes or until top is looking ‘frothy’.
  • Prepare the bench top for kneading by wiping it down, sprinkling it with plain flour and having 1 cup of flour on standby.
  • Combine flour and salt in a mixing bowl. Make a well in the center and pour the yeast mixture in. Firstly use a fork to combine the ingredients, then use your hands so it comes together well.
  • Turn onto the floured bench and use as much flour as necessary to bring into a firm ball.
  • Begin the kneading process – this should take around 20 minutes in total. Take the ball of dough, place your heel in the centre and then push your heel away from you. Turn the dough 45 degrees and then repeat the ‘pushing the heel away’ process. Once a complete circle has been done, fold the dough over and repeat the process again. You may find that more flour needs to be added as you knead if you find the dough too sticky.
  • Once satisfied with the kneading, form the dough into a ball, place it in a clean bowl and cover with glad wrap. Let it rest for 2 hours or until doubled in size.
  • Take the dough out of the bowl and knead for a further 5 minutes, adding more flour if necessary. Divide dough into 2 portions and place one aside.
  • Roll the ball out forming a warped ‘authentic’ pizza base.
Topping - for 1 pizza
16 medium green prawns
¼ cup light beer – my pick Coopers Clear
2 red capsicums
1 long red chilli
2 tbsp tomato paste
grated cheese – approx. 1 cup
¾ cup raw cashews
  • Finely chop the chilli, trim the heads and tails off the prawns and devein them gently. Place beer, chilli and prawns in a bowl and season well with salt and pepper. Marinate in the fridge for 45min.
  • Preheat fan forced grill. Slice the capsicums in half and remove the stem and seeds. Place on a baking tray and grill until the skin is charred and blistered.
  • Place capsicums in a plastic bag, seal, and leave to cool for 15 minutes. Peel the skins off the capsicum and discard; the skins should literally fall off gently by this stage.
  • Chop the capsicum finely into small pieces as possible and place in a bowl. Roughly chop ½ cup cashew nuts and mix in well with the capsicum. Alternately use a blender and pulse the mixture until a rough paste forms.
  • Preheat fan-forced oven to 200°.
  • Heat the garlic and olive oil in a frypan over medium heat, then cook the prawns for approx. 1min or until coloured and tails are curled. The prawns just need to be seared, as they will cook completely in the oven.
  • Prepare the pizza by spreading the tomato paste over the base. Sprinkle with as much grated cheese as desired. Spread the capsicum mixture across the cheese, arrange the prawns on top and sprinkle with remaining cashew nuts.
  • Cook the pizza in oven for 15min or until deliciously browned and bases crispy.


Sunday, November 20, 2011

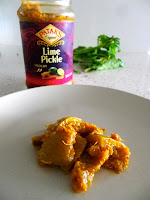
Ingredient 36 - Pickled Lime

Pickled lime is a staple Indian ingredient renowned for its sharp and concentrated flavour.

It can be prepared in the kitchen, with limes requiring an overnight soak in salt to extract their bitterness. It can also be more simply purchased at the supermarket!

Here pickled lime takes a twist on its usual use, being partnered with mango and yoghurt to accompany a deliciously healthy Indian dinner.

Enjoy!

Pan-fried fish on Lentils and Corn with Pickled lime relish
Serves 4

4 small fillets firm white fish
3 cobs corn
2 cups red lentils
1 cup chicken stock
3 cups water – approximately
2 tsp minced ginger
2 tbsp sweet paprika

Pickled lime relish
1/2 cup natural yoghurt
2 tbsp pickled lime
2 tbsp chopped mint
1 mango cheek
  • Bring to boil water and chicken stock in large saucepan. Add the lentils and cook for 10-15 min until still firm but just tender. Drain well and rinse under cold water.
  • Remove corn kernels off cobs.
  • Heat olive oil in deep pan. Add ginger and sauté until fragrant. Add the corn kernels and continue to sauté until kernels are bright yellow.
  • Add the lentils and paprika and continue to sauté for few minutes.
  • Heat pan over medium-high heat. Fry fish for 3-5min on each side until golden. Place on tray and cook for further 10min in oven until just cooked.
  • To make the relish, roughly chop the pickled lime and mint. Take the mango cheek and with a sharp knife slice grid lines into mango then scoop the flesh out with a spoon. Mix the mango, yoghurt, pickled lime and mint together in a bowl. Keep in fridge until ready for serving.
  • To serve spoon lentils and corn on a plate, top with fillet of fish and spoon over some relish.


Sunday, November 6, 2011

Ingredient 35 - Kangaroo

Kangaroo is the renowned marsupial icon of Australia, which was first legalized for human consumption in the country in 1980 in South Australia. The kangaroo meat industry now exports to 55 countries, with meat only originating from free-range animals only.

Kangaroo meat popularity has soared recently, due to its ‘lean red meat’ appeal. Statistics today state approximately 15% of Australians will eat kangaroo meat at least four times a year.

The meat is extremely low in fat, with levels typically between 1-2%, and contains very high levels of protein and iron. Thus great care must be taken when cooking kangaroo due to its susceptibility to be overcooked and become dry and tasteless. Ideally the meat should be marinated for at least 20minutes prior to cooking and be served medium-rare

If not ‘game’ enough, any meat would suffice for this delicious salad!


Kangaroo Summer Salad with Honey Mustard Dressing
Serves 4

4 kangaroo fillets
4 sprigs mint
1 tsp minced garlic
2 tbsp olive oil
½ butternut pumpkin
3 large beetroot
1 tin cooked chickpeas
150g reduced fat feta cheese
small handful baby spinach
4 sprigs mint

Dressing:
1 tbsp chopped mint
1 tbsp wholegrain mustard
1 tbsp honey
½ tsp minced garlic
2 tbsp good quality light olive oil
salt, pepper
  • Preheat oven to 175°.
  • Remove skins of beetroot and pumpkin. Chop vegetables into small cubes – about 2x2cm. Place on baking tray and drizzle with olive oil. Roast in oven for 30min or until just tender.
  • Remove mint leaves off the sprigs. Place kangaroo fillets in shallow dish and using your hands rub them well in the mint leaves, olive oil and garlic. Season with salt and pepper and place the dish in the fridge for 30min to marinate.
  • Heat a frypan over medium-high heat, or alternately a barbeque. Panfry the fillets 3min each side, sealing each side, until medium rare. Let the fillets rest for 10min before slicing thinly.
  • Rinse and drain the chickpeas well. Stir the chickpeas through the roasted vegetables, coating them well with olive oil and roasting juices.
  • Finely slice the baby spinach leaves and mint leaves.
  • To make the dressing place dressing ingredients in small bowl, whisk together until combined and then heat for 30sec in microwave until dressing is warm and bubbling.
  • To arrange the salad mix gently together the roasted vegetables and leaves, layer with sliced kangaroo fillet and crumb the feta on top. Drizzle with dressing and gently toss to combine.

Saturday, October 29, 2011

Ingredient 34 - Wasabi Peas

Wasabi also known as Japanese horseradish comes from the food family that includes cabbage, horseradish and mustard.

Wasabi can be eaten in its root of leaf form or more commonly as a paste. It is not for the naïve chilli patient, with its pungent flavour activating the nasal passages more so than the tongue. One is advised to enjoy it “at a leisurely pace, preferably accompanied by a favourite cold beverage.”

Wasabi peas are roasted dried peas that have been coated in a spicy wasabi coating. Here they prove to be more than just a snack food, providing a great variation to the boring crumbed chicken.

Enjoy!

Wasabi Pea and Macadamia Crusted Chicken on Soba Noodle Salad
Serves 6

2 x 100g packet Wasabi Peas
130g macadamia nuts
½ cup panko breadcrumbs
3 eggs
½ cup skim milk
5 chicken breasts
1 packet Hakubaku soba noodles (270g)
2 avocado
bunch of coriander
6 shallots

Dressing:
1 tbsp wasabi paste
3 tbsp soy sauce
1 tbsp rice wine vinegar
  • Preheat oven to 170°.
  • Place wasabi peas, macadamias and breadcrumbs in blender and blend until roughly chopped. Spread the mixture out across a shallow dish.
  • Whisk eggs and milk in a mixing bowl.
  • Take a chicken breast and ‘dunk’ it in the egg mixture and then coat well with the crumbs mixture, ensuring all the breast is covered and place on a baking tray. Repeat for the remaining breasts.
  • Bake the chicken in preheated oven for 50min.  Let them rest for 10min before slicing carefully into thick strips.
  • Cook the soba noodles according to the packet instructions, being wary that soggy soba noodles are not nice! Once cooled and drained place noodles in large salad bowl.
  • Slice the shallots thinly in white section and thicker in green, and roughly chop the coriander. Remove skins and seeds of avocado and then thinly slice the avocado.
  • Place salad ingredients on top of soba noodles, drizzle with dressing, and gently toss together. Serve with chopped green chilli if desired and extra dressing.


Monday, October 17, 2011

Ingredient 33 - Maple Syrup

Maple syrup is as North Americans might describe, as one of the many wonders of the world.

It is obtained via ‘tapping’ or drilling sugar maple trees, releasing a clear tasteless sap which is then boiled down to a sugary sweet syrup. A single tree can produce 30-50L of sap a year, yet when boiled down only produces 1L of syrup.

Maple syrup although part of the naughty sweet food group, contains fewer calories than honey as well as being a good source of zinc and magnesium.

The secret is in the quality of the syrup – ‘maple syrup’ is made entirely of maple sap, so be wary of the cheaper artificial imitations out there as they won’t taste nearly as good!

An indulgent dessert perfect to fix any rugby loss blues.


Chocolate Meringue with Banana, Maple Syrup and Hazelnut Topping

6 egg whites
1 ¼ cup caster sugar
2 tsp cornflour
2 tsp white vinegar
1 tbsp cocoa
2 tbsp hot water
3 bananas
250mL good quality maple syrup
3 tbsp thin light cream
¾ cup hazelnuts
30g 85% dark chocolate
  • Preheat oven to 170°.
  • Lay the hazelnuts on a tray and roast for 5min. Remove from heat, slightly cool the nuts and then rub them in a clean tea-towel until the skins slide off. Discard skins and roughly chop the nuts in half.
  • Reduce the oven to 130°.
  • Using electric beaters beat the egg whites until stiff. Gradually add the caster sugar 1 spoonful at a time, beating well after each addition. Place a little bit of mixture between two fingers and rub together; if you feel a gritty consistency then mixture must be beaten some more.
  • Place the cocoa and hot water in a small mug and stir until it forms a smooth paste.
  • Add the cocoa mixture, cornflour and vinegar to the egg white mixture and beat until well combined.
  • Spoon the meringue mixture on a paper lined baking tray, forming a rectangular shape, and smooth the top with a spoon.
  • Bake the meringue slowly in the oven for 1hr 20min or until the top is firm and cracked. Cool on tray.
  • Peel and slice the bananas in half lengthways and then half again. Sprinkle with a little bit of lemon juice to avoid browning.
  • Pour the maple syrup and cream in a deep fry pan and place the bananas gently flat side down in the liquid. Bring the mixture to a simmer over medium-low heat and then simmer for further 20min. Add the roasted chopped hazelnuts.
  • To melt the chocolate, pour some boiling water in a large bowl and place another bowl on top so it seals over the other completely. Place the chocolate in the top bowl and stir continuously until melted.
  • Once meringue is cool layer the banana mixture on top, leaving an inch border around the edges, drizzle with melted dark chocolate and serve with icecream.


Wednesday, October 12, 2011

Ingredient 32 - Brussels Sprouts

Brussels sprouts are the quaint and often ridiculed vegetable that forms part of the cabbage family. They are leafy little green gems, resembling mini cabbages originating from the area that is now known as Belgium.

They are one of the healthiest vegetables, rich in Vitamin C and E, folate and iron. One of the biggest mistakes made when cooking with Brussels sprouts is that they are often overcooked; leaving a very bad tainted flavour.

Cooked to perfection Brussels sprouts should be tender with a slight bite, and bright green in colour. That way I will guarantee you will fall in love with them!

Warm Brussels Sprouts and Pink Lady Apple Salad
Serves 4 as side salad

20 Brussels sprouts
½ tsp minced garlic
2 tbsp olive oil
2 Pink Lady apples
½ lime
cold water
100g feta cheese
¼ cup pine nuts
3tbsp good quality Balsamic Vinegar
  • Preheat oven to 180. Toast pine nuts for 4-5min on baking tray until golden; be wary you don’t overcook and burn them.
  • Quarter the apples and then slice further into small chunks. Place the apple in a small bowl, sprinkle over the juice of ½ lemon and then cover generously with cold water. Place in the fridge for 20min.
  • Trim the Brussels sprouts by chopping off the stalk end, then slicing them in half lengthways.
  • Heat the garlic and olive oil in a frypan over medium-low heat. Add the Brussels sprouts and sauté gently for 10min. Add the apple and sauté for further 4min or until the sprouts are lovely and tender.
  • To arrange place the salad ingredients on a large serving platter, stir through the basil, sprinkle with feta cheese and drizzle with balsamic vinegar. Serve immediately.


Monday, October 3, 2011

Ingredient 31 - Wonton Wrappers

Wonton wrappers could be described as the Chinese version of pasta.

The wrappers themselves are made of flour, egg and water. Traditionally they are filled with a meat mixture, steamed or deep fried and served up as pocket sized little dumplings.

Today however the wrappers are become particularly versatile – used as savoury quiche bases, fried to form dipping crackers, steamed and served in soups, and turned into chocolate and almond dumplings.

Here the wonton wrappers take a twist on the traditional ravioli.

Naughty but delicious!


Pumpkin Ravioli with Balsamic Butter and Walnuts
Serves 3

Pumpkin – approx. 300g piece
cup freshly grated Parmesan cheese
½ cup Ricotta cheese
1 packet frozen Wonton Wrappers (square, 40)
3tsp good quality balsamic vinegar
6 tbsp butter
cup chopped walnuts
  • Preheat oven to 180.
  • Remove wonton wrappers from freezer and bring to room temperature.
  • Slice skin off pumpkin and chop into small chunks. Place pumpkin on a baking tray, drizzle generously with olive oil and roast for 30min or until soft.
  • Mash the pumpkin until smooth in a mixing bowl. Add the ricotta and parmesan cheese and mix well.
  • Remove wonton wrappers from packet. Trim them into small squares with a sharp knife – approx. 4x4cm.
  • To make the ravioli place a wonton square on the chopping board, spoon 1 good teaspoon of pumpkin mixture into the middle of the square, wet your finger with water and trace the square border, place a piece of wonton wrapper on top and then gently push down, allowing the wrappers to stick together. Make sure you squeeze out any excess air whilst doing this. Then gently press the fork tongs on the edges of the ravioli creating the serrated ‘fancy look’. Repeat with remaining mixture.
  • Bring a large saucepan of salted water to the boil. Gently spoon around 4 ravioli into the boiling water and cook for about 3min or until edges curl up and the ravioli float to the top. Remove and drain. Repeat with remaining ravioli.
  • Be careful not to overcook the ravioli as this causes the wonton wrappers increase greatly in size, become very floppy, and you will also lose the serrated fancy edge.
  • Heat a fry pan over medium-low heat. Place the butter and walnuts in the pan and simmer for about 2min until bubbling, add the balsamic and simmer for a further 2min.
  • Arrange the ravioli on plates, spoon over the balsamic butter mixture and nuts and serve immediately. 

Sunday, September 25, 2011

Ingredient 30 - Pickled Ginger

Pickled ginger or Gari as the Japanese would say is a sweet, thinly sliced young ginger, pickled in a sugar and vinegar solution.

Homemade pickled ginger resembles a pale yellow to slightly pink colour, whereas the commercially bought ginger at the supermarket is often psychedelic pink from artificial coloring.

It is most commonly served with sushi to help enhance the flavours, but can be eaten between different servings of sushi to help cleanse and neutralize the palate before the next flavour injection.

So for the fellow sushi lovers out there – enjoy this delicious salad!

Salmon and Pickled Ginger Sushi Salad

1 salmon fillet – skin off
1 medium sweet potato
2 tbsp olive oil
1 cup sushi rice
2 cups cold water
3 spring onions
½ continental cucumber
1 large handful snowpeas
½ avocado
½ red onion
1 handful of baby spinach leaves
¼ cup pickled ginger, drained

Dressing: (optional – can just use soy sauce)
½ lime
4 tbsp rice seasoning
1 tbsp fish sauce
1 tbsp sweet chilli sauce
  • Preheat oven to 180.
  • Remove skin of sweet potato and slice across width into 1cm thick pieces, then half again forming semicircles.
  • Arrange sweet potato on baking tray, drizzle with olive oil and roast in oven for 20min or until tender.
  • Rinse the sushi rice under tap water at least 3 times until water is clear to remove extra starch. Place in a rice cooker with 2 cups of tap water and cook according to machine. Once finished remove immediately, spread across a tray and sprinkle with 3tbsp rice seasoning. Stir well and place in freezer for 20min or until cool.
  • Heat a frypan over medium heat. Sear the salmon steak on each side for a minute until crisp. Place in the oven for a further 10min until cooked. Allow to stand for 10min to cool, before flaking the fillet into small pieces with a fork.
  • Slice the shallots thinly in white and thicker in dark green sections. Chop the cucumber thinly into circles. Top and tail the snow peas and half lengthways.  Roughly chop the spinach leaves. Slice the avocado into long thick pieces and drizzle with a little lime juice to prevent browning prior to serving.
  • Drain the pickled ginger and roughly chop.
  • To make the dressing, which is optional, combine remaining rice seasoning, fish sauce, sweet chilli sauce and lime juice in a jar and shake well.
  • To arrange the salad lay the rice on a large serving platter. Mix in the salad ingredients, lay the salmon on top, sprinkle with pickled ginger and drizzle over some dressing.
  • Serve with extra soy sauce, lime and chopped chillis.


Sunday, September 18, 2011

Ingredient 29 - Puffed Brown Rice

Puffed brown rice is a popular alternative to the usual puffed grains used in cereals for those gluten intolerant.

The process of puffing grains dates back to the 1930s and is created by exposing the product to high pressures with steam that ‘pops and bloats’ the kernel into a much larger size. The three most common puffed grains used are rice, wheat and corn, seen in cereals such as Coco Pops and Rice Krispies.

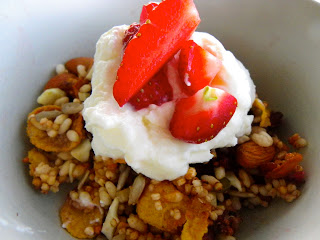
One of my little obsessive traits in life I will admit is my breakfast routine of muesli, fruit and yoghurt. Hence the inspiration for this recipe.

This cereal I will admit is perfect; it is not overly sweet, contains the perfect ratio of grains to seeds to dried fruit, feels light, is absolutely delicious, and will guarantee you a fabulous start to the day!


The Ultimate Toasted Gluten-Free Muesli
Makes 1 large container

2 cups puffed brown rice
2 cups puffed quinoa
2 cups gluten free cornflakes
¾ cup whole almonds
½ cup pepita seeds
½ cup sunflower seeds
½ cup pure apple juice
¾ cup honey
½ cup finely chopped dried apple
½ cup dried cranberries
  • Preheat oven to 150°.
  • Place the puffed grains, cornflakes, almonds and seeds in a deep baking dish.
  • Heat the honey and apple juice in a microwave for 2min until bubbling. Mix well together.
  • Pour the liquid over the muesli ingredients and mix well. Place in the oven and toast for 30minutes, removing the tray every 5min to mix together. It is important to do this to ensure no nuts or flakes are burnt!
  • Remove from the oven, stir through the chopped apple and cranberries, and let the muesli cool completely.
  • Serve with fresh fruit, greek yoghurt and milk.
  • Between breakfast sittings store in a dry well sealed container. If the cereal does get a little soggy, a quick re-toasting in the oven will work like a treat.


Sunday, September 4, 2011

Ingredient 28 - Purple Carrots

Purple carrots are the original carrot, stemming back to 5000 years ago in area today known as Afghanistan.  The orange carrot then followed centuries later, bred by the Dutch in the 1500s.

Carrots are an excellent vegetable, containing high amounts of beta-carotene, Vitamin A, potassium, vitamin C and B6. They are cholesterol free, a great fibre source, and also contain phytochemicals with proven antibacterial and anti-inflammatory benefits.

Surprisingly, purple carrots are far more nutritious than their orange counterparts. They contain up to 28 more anthocyanins, which given it their characteristic purple colour, that have antioxidant, anti-inflammatory, antimicrobial and anti-carcinogenic properties. 

Purple carrots are apparently making a comeback, so keep an eye out for these little exotic gems in the supermarket. 

The perfect salad for a Fathers Day/friends picnic!

The Asian Picnic Coleslaw
Serves 8

1 cup raw cashew nuts
2 tbsp sesame seeds
2 tbsp soy sauce
4 purple carrots
1 cucumber
¼ wombok cabbage
3 spring onions
1 long red chilli
juice of 1 lime
1 tbsp soy sauce
1 tbsp sweet chilli sauce
1 tbsp fish sauce
2 tbsp water
  • Preheat oven to 180.
  • Roughly chop the raw cashew nuts. Lay the nuts and sesame seeds on baking paper.  Roast in oven for 10min in total, stirring the nut concoction half way through.
  • Thinly slice the wombok cabbage, spring onions and red chilli.
  • Slice the cucumber in half lengthways and remove the soft core, then grate roughly along with the washed purple carrots.
  • Place all salad ingredients in large serving bowl.
  • To make the dressing combine the lime juice, sauces and water in a small jar. Shake well.
  • Prior to serving sprinkle salad with nuts, pour over dressing and toss well.


Monday, August 29, 2011

Ingredient 27 - Black Sesame Seeds

Sesame seeds are considered by some to be the oldest condiment on Earth, dating back as early as 1600BC. 

They are tiny flat oval seeds with a subtle nutty flavour and delicate crunch. The seeds come in a variety of flavours, with lighter coloured more common variety used more in West and Middle East and black in Far East.

Black sesame seeds are the only variety not hulled, in comparison to white ones, thus providing far more calcium and essential fatty oils. They also are much stronger in flavour.

This is a deliciously light salad, and perfect for the gluten free housemates with the quinoa (‘keen-wah’) addition.

Enjoy!

Roasted Pumpkin, Beetroot and Sesame Seed Quinoa Salad
Serves 6

800g kent pumpkin
2 bunches baby beetroot
olive oil – approx. 5tbsp
1 garlic clove, crushed
3 tbsp black sesame seeds
3 green shallots
2 cups quinoa
4 cups boiling water
5 tbsp chopped fresh mint
1 cup natural yoghurt
1 tsp smoked paprika
  • Preheat oven to 180°.
  • Trim stalk and roots off beetroot and rinse well. Chop pumpkin and beetroot into small cubes (approx. 1x1cm).
  • Drizzle generously with olive oil and mix in the crushed garlic. Roast vegetables in oven for 15min then mix in the sesame seeds and 1tbsp chopped mint, and return to the oven for further 15min until tender.
  • Slice white part of shallots thinly. Heat 1tbsp olive oil in deep saucepan and sauté shallots until soft and golden in colour.
  • Add the quinoa and stir for about 2min until translucent. Pour in the boiling water and continue to simmer, for approx. 20min until liquid is absorbed and quinoa is cooked. Avoid overcooking to a mushy consistency - it should still have bite. Remove from heat and season well.
  • Combine yoghurt and smoked paprika in small bowl.
  • Arrange quinoa on serving platter. Top with roasted vegetables and chopped mint, and finally drizzle with yoghurt mixture.


    Monday, August 22, 2011

    Ingredient 26 - Peanut Oil

    Peanut oil is oil derived from peanuts, creating a pleasant light nutty flavour.

    Due to its high boiling point, peanut oil is perfect for deep-frying as it can reach higher temperatures, resulting in lower oil absorption in the foods and creates a nice crisp fried layer.

    Despite the fact that it belongs to the naughty high calorie food group, peanut oil has a great lipid profile containing high amounts of unsaturated fats (ie. omega 6 linoleic acid) and low amounts of saturated fats. In addition it is cholesterol free and contains valuable amounts of vitamin E.

    I have never deep-fried anything before; I rephrase, I have never considered even cooking a recipe that required deep-frying. However I will admit this creation pleasantly surprised me!

    The perfect start to a dinner party.


    Chilli and Lime Squid

    6 squid tubes
    1 cup plain flour
    juice of 1 lime
    1 tbsp dried chilli flakes
    1 tbsp sea salt flakes
    peanut oil – approx. 600mL bottle
    cracked salt and pepper
    lime wedges to serve
    • Slice the squid tubes open, lay them flat on chopping board and score them both horizontally and vertically. Cut the squid then into large diamond shaped pieces.
    • Mix the flour and salt together in a bowl.
    • Pour the peanut oil into a large deep fry pan, ensuring that the liquid is about 7cm in thickness. Heat the oil over high-medium heat until you can see little bubbles at the bottom.
    • Dust the calamari lightly in flour and place gently in the pan of hot oil. The pieces should immediately curl up at the sides. Ensure each area of the calamari is coated and cooks in oil, turning them over if required.
    • Remove from oil when the squid pieces are golden brown in colour. Drain on absorbent paper. Continue to cook remainder of the squid.
    • Place the squid in large bowl. Drizzle with lime juice, dried chilli flakes and cracked salt and pepper, and toss well.
    • Serve immediately with extra lime wedges.


    Saturday, August 13, 2011

    Ingredient 25 - Pearl Barley

    Pearl barley is the ‘polished’ derivative of the cereal grain barley.

    It is the end product after several processes involving the removal of the two outer hulls and bran layer. This means it is less nutritious than its ‘pot’ and ‘scotch’ barley counterparts which are less refined; however in comparison to couscous and white rice, pearl barley has a much a higher fibre content as well as providing many essential minerals and vitamins.

    The perfect healthy accompaniment to an Indian curry!

    Tandoori vegetable and Pistachio Pearl Barley Salad
    Serves 6 as side dish

    ½ cauliflower
    400g kent pumpkin
    2 long red chilli
    1 carrot
    1 can chickpeas, drained
    1 cup low fat greek yoghurt
    ½ tbsp sweet paprika
    ½ tbsp ground coriander
    ½ tbsp cumin seeds
    ½ tbsp mustard seeds
    1 tsp garam masala
    ½ cup tinned diced tomatoes
    1 cup pearl barley
    1 ¼ cup water
    cinnamon stick
    1 chicken stock cube
    1 tbsp lemon rind
    ¾ cup unshelled pistachio (150g)
    flat leaf parsley
    lemon wedges
    • Preheat oven to 180°.
    • Remove stalks from cauliflower and chop into small florets. Chop the carrot and pumpkin into small chunks. Finely slice the chilli.
    • In a large bowl mix the vegetables, yoghurt, tinned tomatoes, and spices (paprika, coriander, cumin, mustard seeds, garam masala). Make sure vegetables are well coated in yoghurt mixture.
    • Arrange vegetables on a baking tray and roast in the oven for 30min, then remove and gently stir through drained chickpeas. Add a drizzle of olive oil if desired. Roast for a further 15min or until cooked; you want the vegetables still firm and holding their shape.
    • Bring water, stock and cinnamon stick to boil in medium saucepan. Add the pearl barley and lemon rind and continue to simmer until all water is absorbed. Stir a few times during this to ensure no sticking to bottom of pan. The pearl barley should still have a slight bite to it. Drain well.
    • Dry fry the pistachio kernels for a few minutes in a small saucepan until roasted.
    • To serve place the pearl barley on large serving platter, spooning over the tandoori vegetables, and scatter with pistachios and flat leaf parsley.
    • Serve with lemon wedges and riata.


    Saturday, August 6, 2011

    Ingredient 24 - Rosewater

    Rosewater is simply the leftover liquid when rose petals and water are distilled together.

    It dates back to early Romans, traditionally made using damask roses for the purposes of bathing and cosmetics. It also today still holds great sacred importance in the cleansing rituals of Muslim and Hindu religious ceremonies.

    Rosewater is also used widely for culinary purposes, especially sweets such as mango lassi, marzipan, Turkish delight, and even marshmallows.

    It provides a unique sweet aroma and taste, and is a great addition to baking as these friands demonstrate!

    Perfect for Fat Friday at work!


    Rosewater and Strawberry Friands
    Makes 12

    1 ¼ cup icing sugar
    1 cup almond meal
    cup plain flour
    5 egg whites
    2 tbsp rosewater
    125g butter
    strawberries
    • Preheat fan-forced oven to 180. Grease a muffin pan lightly with butter.
    • Melt butter in a bowl in microwave.
    • Hull and slice the strawberries lengthways.
    • Beat the egg whites in small bowl with hand held beaters until soft peaks form.
    • Sift the flour and icing sugar into a large bowl. Stir through the almond meal. Fold in gently the egg whites, melted butter and rosewater. Be careful not to over-stir the mixture or the friands will be tough.
    • Spoon into the muffin pans and place a strawberry piece on top, pressing gently into the friend.
    • Cook in oven for 15min or until golden and bounce back when pressed lightly.

    The view from my kitchen early Friday morning - why wouldn't I want to bake!

    Sunday, July 31, 2011

    Ingredient 23 - Galangal

    Galangal is a member of the ginger family. It is quite bizarre in appearance – very ‘knob like’ with its characteristic orange rhizomes, and has a similar flavour to ginger although is a little stronger and more citrus in nature.

    Galangal is available in fresh, dried or powder form, and is used in a wide range of Asian dishes such as clear soups and curries. Here it adds an excellent punch to some yummy rolls.

    Enjoy!


    Caramelised Beef and Galangal Vietnamese Rolls
    Makes 8 rolls

    1 piece rump steak (approx 350g)
    galangal – 6cm x 3cm piece
    ginger – 3cm x 1cm piece
    1 tsp minced garlic
    1 tbsp sesame oil
    ½ tbsp fish sauce
    ½ tbsp rice wine vinegar
    ½ cup packed brown sugar
    juice of 1 lime
    1 red chilli
    200g piece of sweet potato
    1 tbsp olive oil
    large handful baby spinach leaves
    100g packet vermicelli noodles
    8 rice paper wraps
    lime wedges – to serve
    • Preheat oven to 180°. Peel the sweet potato and chop into fine matchsticks, about half the length that the rolls will be. Place on baking tray, drizzle with olive oil and cook in oven for 15min or until just tender.
    • Peel the skin off the galangal and ginger pieces and then using a grater, grate into thin fine pieces.
    • Slice the rump steak into thin strips and remove any excess fat.
    • Heat the sesame oil in a large fry pan. Add the galangal, ginger and garlic and stir around the pan until aromatic. Add the fish sauce, rice wine vinegar, lime juice and sugar and stir all ingredients until just combined.
    • Add the beef and bring the ingredients to a bubble in the fry pan, stirring occasionally to ensure meat browns. Initially there will be a lot of liquid released from the meat, however let it continue to bubble and it will reduce. Keep on heat for around 15min or until the liquid has reduced more than half and the beef is cooked but still lovely and tender. Place beef on a plate with the remaining sauce.
    • Cover the vermicelli noodles in a bowl of boiling water and let it stand for 15min or until tender. Drain the noodles well and quickly run a knife through the noodles in bowl to chop into more manageable size. 
    • Chop the spinach and finely dice the chilli.
    • Now get the bench set up – this is the key to a good roll! Arrange all the ingredients on little plates, have a shallow dish of boiling water to soften the rolls (ie. a quiche flan is perfect), a chopping board for rolling and a clean plate to put the finished rolls on.
    • Dip the rice paper roll in the boiling water for around 5 seconds; it should still feel firm and not completely soft. Remove quickly and lie flat on the chopping board – the board will soak up extra water as well as continue to let the wrap get softer. Place some noodles, spinach leaves, sweet potato and then beef strips in a little row in the centre of the roll, leaving a gap at each edge (ie. at least two thumb prints size). Sprinkle with a little chilli and drizzle with some juices. Fold in the edges in first, and then roll from the bottom upwards, tucking in the ingredients as you go.  The finished product should be firm and not too big or the ingredients will pop open.
    • Serve the rolls immediately with extra lime wedges and remaining sauce.